By Sean Conway
Among the many virtues of microgreens is the ease with which they can be grown on a countertop or windowsill
Growing fresh greens outside in the middle of winter is not an option in most of the country. But growing fresh greens in your kitchen can be -- if you grow microgreens.
Microgreens are simply sprouted seeds that have grown on a bit. They're becoming more popular due to their vibrant colors and textures, their wonderful, delicate taste, and the ease with which you can grow them.
As the name implies, growing microgreens requires very little space. They can be grown on a countertop, a windowsill or under grow lights in a basement. You can even grow them at your office for a fresh addition to your lunchtime salad.
These tasty seedlings are also quick to grow, with most ready to harvest within four to 14 days. The shelf life of the seed can be anywhere from two to five years, and the microgreens themselves last up to a week.
The seeds of many plants can be grown into microgreens, often producing much different flavor than the adult form of the plant that produced the seed.
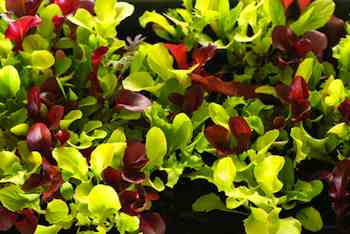
Seeds from popular leafy plants such as arugula, cress, mustard and radish, which many of us are accustomed to seeing in our salad bowls, make excellent candidates for growing as microgreens. Other popular choices such as red cabbage, broccoli and even peas can be grown as microgreens.
Microgreens are packed with nutrition. They contain vitamins such as A, B, C, E and K, as well as calcium, iron, potassium and antioxidants. Some contain up to 30 percent protein.
Microgreens differ from sprouts in that sprouts are eaten roots and all. The roots of microgreens are buried in either soil or a moisture-holding medium, and they are left to grow until the seedlings are producing chlorophyll. Once they reach this stage, they are harvested by cutting the plants off at the base.
Growing your own fresh greens couldn't be easier, and they are a great way to interest kids in gardening and healthier eating.
Here are the materials you will need: seeds; a sprouting container (necessary for seeds that need pre-sprouting before planting); sterilized seed starting mix or potting soil; and a clean, plastic-lidded container with bottom drainage or terracotta pot for growing greens on. An organic water-soluble fertilizer is optional.
As for tools, you'll need a spray bottle; a mixing bowl, a spoon and a clear plastic bag.
First, prepare your seeds by soaking in sprouter, following seed package directions. Some seeds, such as arugula, will not require initial sprouting.
Then add a 1- to 2-inch think layer of moist soil to your selected container. Evenly spread seeds on top of soil. Gently mist the seeds with a spray bottle of water. Seeds should be moistened but not swimming in water.
Place the container or pot near a window but out of direct sunlight. If you have a lidded container, cover it to hold in moisture until seeds germinate. If using a pot instead of a plastic-lidded container, cover it with a plastic bag during germination stage. Once tiny roots form, open lid or remove plastic bag and place container in a location with good air circulation and indirect light for the balance of growing period.
Keep soil evenly moist but not soggy at all times by misting seedlings with spray bottle. As roots grow in, water more deeply and less frequently, never allowing water to pool around young seedlings.
Depending on the greens, harvest in four to 14 days. If cut back with scissors, some greens will put on a second flush of growth like cut-and-come-again lettuce.
© Cultivating Life by Sean Conway
AUTOS | HOBBIES | EDUCATION | FAMILY | FASHION | FOOD & RECIPES | HOME DECOR | RELATIONSHIPS | PARENTING | PETS | TRAVEL | WOMEN
Home & Garden - Grow Salads All Through Winter with Microgreens