- MENU
- HOME
- SEARCH
- WORLD
- MAIN
- AFRICA
- ASIA
- BALKANS
- EUROPE
- LATIN AMERICA
- MIDDLE EAST
- United Kingdom
- United States
- Argentina
- Australia
- Austria
- Benelux
- Brazil
- Canada
- China
- France
- Germany
- Greece
- Hungary
- India
- Indonesia
- Ireland
- Israel
- Italy
- Japan
- Korea
- Mexico
- New Zealand
- Pakistan
- Philippines
- Poland
- Russia
- South Africa
- Spain
- Taiwan
- Turkey
- USA
- BUSINESS
- WEALTH
- STOCKS
- TECH
- HEALTH
- LIFESTYLE
- ENTERTAINMENT
- SPORTS
- RSS
- iHaveNet.com
How to Propagate Plants with Clippings
Sean Conway
Propagating Houseplants
I once owned and operated a retail nursery that specialized in uncommon garden plants, and I often had to search far and wide to obtain new stock. So I can certainly sympathize with gardeners who covet a particular plant but are unable to find a place to buy it.
One of the great joys of gardening is sharing plants with friends. And many plants can be reproduced without the long process of cross pollination and seed production, simply by taking a part of the existing plant and tending it until new roots or shoots form.
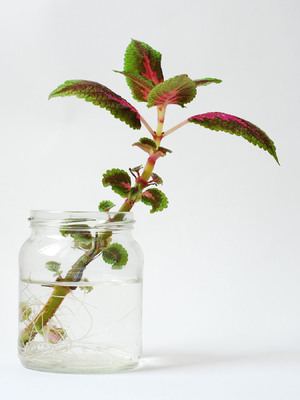
Quite a few plants have the ability to grow new roots from pieces of stems that have been separated from the parent. These are referred to as stem cuttings. Some plants will only form roots on the stems of tender soft tissue, while others such as shrubs will only form roots on older, firmer stems.
Another form of propagation, which is frequently used in the nursery industry but seldom practiced by home gardeners, is to take root cuttings. The plant's roots are cut into small pieces and placed in sealed plastic bags containing either sand or perlite. Depending on the type of plant, new shoots will sprout from the pieces of root within weeks to months. Many types of perennials are reproduced this way.
A third method of propagation is called division. In this case, the plant is reproduced by separating a single clump, much like separating Siamese twins. Care must be taken to include roots and top growth for both pieces.
The best way for novice gardeners to try their hand at propagation is to do stem cuttings. Many types of garden plants can be propagated this way, but I recommend practicing on houseplants as a great way to learn the technique.
Start by filling a small pot with sterile, porous medium such as perlite or sand. The medium should allow water to flow through quickly but also stay moist.
Choose a plant such as a begonia that has soft, succulent stems, and use a sharp instrument such as an X-Acto knife to cut a 1- to 2-inch piece of stem just below a leaf. Be sure to include several leaves above the cut.
Next, dip the cut end of the stem into a rooting powder. Rooting powder contains root-stimulating hormones and can be purchased online or at your local garden center.
Using a pencil, make a small hole into the moist sand or perlite, and place the cutting into it. Repeat the process, and then gently water the medium again to firm it up around the cutting, removing excess air pockets around the stems in the process.
Next, place a plastic bag over the pot to create a humid environment for the cuttings. This will mitigate moisture loss and encourage roots to form.
Place the cuttings in bright light but out of direct sun. Remove the bag for about a half hour each day, and keep the medium moist.
Roots should begin forming within a week to 10 days. Gently lift the cuttings with a fork to inspect for roots. Once they form, move the newly rooted plants into pots of their own with soil.
Mastering the art of propagation is not only rewarding, it can help solve the problem of obtaining that coveted plant -- provided it's owner is willing to share!
AUTOS | HOBBIES | EDUCATION | FAMILY | FASHION | FOOD & RECIPES | HOME DECOR | RELATIONSHIPS | PARENTING | PETS | TRAVEL | WOMEN
© Tribune Media Services