By Sean Conway
Given its beauty and durability, it's easy to see why copper has been a favorite material of artisans for thousands of years. It's one of the easiest metals to work with, and it stands up well to the elements. Exposed to the air outdoors, copper develops a beautiful greenish patina as a result of oxidation. This is what gives the Statue of Liberty its stunning color, which grows more beautiful with each passing year.
Copper's durability, workability and beauty make it ideal for domestic architecture as well. While a house roofed in copper is a rarity, many homes use copper for flashings, gutters and downspouts, and for all sorts of decorative touches. It's also an excellent material for use in the garden. Soft and pliable, easy to cut and can be shaped into a variety of forms.
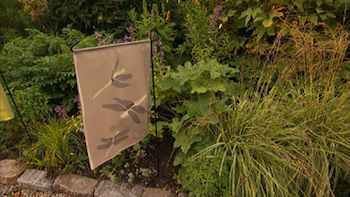
Recently on "Cultivating Life," my guest Julie Blount showed me how to turn sheet copper into whimsical garden markers that will last for years. (See Video Below) Julie's copper praying mantis and dragonfly markers are the perfect addition to any garden. Making the markers may seem puzzling the first time you do it, but once you go through the process you will realize how easy it is. Also, if you don't have some of the tools listed below, don't be afraid to acquire them. You can buy them inexpensively, and they'll come in handy for any number of craft projects
You will need 30 gauge copper sheets, some copper or other type of metal rods, solder, flux, a vice, some tin snips, needle-nose pliers, a metal scribe or awl, a small propane torch, a large nail, a wood block, and a piece of masonite or hard wood for a work surface.
To begin, download one of the origami insect patterns from the Cultivating Life website or other origami source. Next, cut out the design and trace the image onto a copper sheet with metal scribe or awl.
Now, cut the design out with tin snips. Where the copper will be folded, make dotted lines.
For garden markers, at this stage inscribe, stamp or write with permanent marker the name of the plant you wish to mark on a flat area of the ornament.
Now, using the needle-nose pliers, bend the ornament into a 3-D shape along the dotted lines. Next, bend the top 1 to 2 inches of the metal rod into an "L" shape, creating a shelf on which to attach the ornament.
Now, solder the rod to ornament by painting soldering flux onto the rod and bottom of ornament at the point of attachment. Holding the rod in place, heat the copper ornament and rod with the propane torch. Place solder onto the heated metal, which will fuse the two pieces. Hold in place until cool. Your marker is ready to place in the garden.
© Sean Conway
AUTOS | HOBBIES | EDUCATION | FAMILY | FASHION | FOOD & RECIPES | HOME DECOR | RELATIONSHIPS | PARENTING | PETS | TRAVEL | WOMEN
Home & Garden - Touch of Patina: What Copper Can Do for Your Garden